
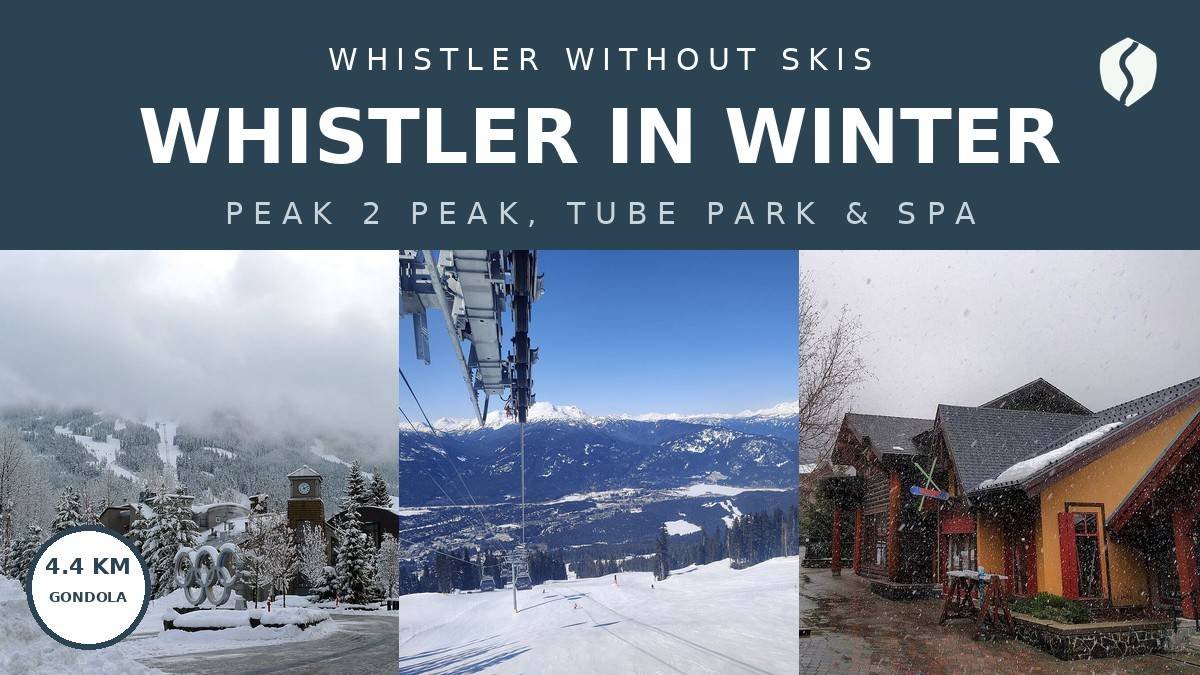
- ✓ You do not need skis to fill two full days here: a record-breaking gondola, a tube park, snowshoe trails, an outdoor rink, an Olympic sliding track you can ride as a passenger, a silent spa, and a light walk in the forest after dark.
- ✓ Do the gondola first, and do it on the clearest morning you get: Whistler weather changes fast, and the whole ride is about the view — cloud means you paid for fog.
- ✓ All prices below are planning ranges, not quoted rates: gondola, tube, spa and tour prices change by date, so check the official sites linked in each section for your exact dates.
Here’s the thing about Whistler: everyone assumes it’s a ski trip or nothing. I’ll be honest — I assumed that too, the first time a friend invited me along. I don’t ski. I have tried, twice, and both times ended the day damp, sore, and quietly relieved to be back indoors. So I went to Whistler expecting to be the person waiting in the lodge while everyone else had fun. Instead I came home with a full trip of my own — and a color-coded spreadsheet, obviously, because that’s who I am.
Whistler in winter without skis is not a compromise version of the trip. It’s a different trip, and in some ways an easier one: no lift-line strategy, no rental boots, no falling over in front of teenagers. You ride the same gondolas, eat in the same village, and watch the same mountains — you just do it on foot, on a tube, on snowshoes, or in a hot pool. Fair warning, though: this guide is honest about the limits too. There are things non-skiers genuinely cannot do, and one weather truth (rain at village level) that nobody’s brochure mentions loudly enough. Both are covered below, so you can plan around them instead of discovering them mid-trip.
A confession to start: I cried a little on the Peak 2 Peak Gondola. Not from fear — from the view. Forty-three stories above a frozen creek, two mountains sliding past the glass, and me, a non-skier, right in the middle of it. You’ve got this. This guide is the trip I wish someone had handed me before my first winter weekend here.
Getting to Whistler without a car
Whistler sits about 125 km north of Vancouver, up the Sea to Sky Highway — the same road my Sea to Sky highway stops guide follows, if you want to turn the drive into a day of its own. I took the bus both times and never once wished I had a car. Coaches run from downtown Vancouver and the airport to Whistler Village in roughly two hours, and once you’re in the village, everything in this guide is walkable or a short local bus ride away. Trust me on this one: village parking is pricey and scarce, and you will not use a car once you arrive.
If you do drive, the highway is a proper mountain road in winter — snow tires or chains are legally required on this route in the cold months, and the drive can slow to a crawl in a storm. My winter driving guide covers what that rule actually means for visitors. If you’re coming from Vancouver for the weekend, the bus is the low-stress choice, and it drops you right in the village. I timed it: downtown Vancouver to Whistler Village, door to door, just over two hours on a clear day.
One more planning note, because it shapes everything below: Whistler Village sits low, at around 670 metres. That means mild spells can bring rain to the village while it’s snowing hard up the mountain. Pack a waterproof jacket no matter what the forecast says, and plan your gondola ride for the clearest morning of your trip — not the first one, the clearest one. I learned this the soggy way, standing in drizzle at village level while the mountain cams showed blue sky above the clouds. The mountain is often above the weather, not in it.
The 8 non-skier stops, on a map
Eight stops, all reachable without skis. Tap any stop to jump the map straight to it.
Map data © OpenStreetMap contributors. Open the full map
Peak 2 Peak Gondola — the ride that is the trip

If you do one thing in Whistler as a non-skier, do this. The Peak 2 Peak Gondola links Whistler Mountain and Blackcomb Mountain in a single 4.4 km crossing that takes about 11 minutes — and it is, genuinely, the most spectacular 11 minutes in Canadian mountain tourism. When it opened in 2008 it set world records: the longest unsupported span between two lift towers (3.024 km) and the highest lift of its kind, hanging up to 436 metres above the valley floor. I double-checked those numbers on Whistler Blackcomb’s published lift specs before writing this, because they sound made up and they are not.
Here’s how it works for non-skiers, because the system confuses everyone the first time: you cannot board Peak 2 Peak from the village. You ride the Whistler Village Gondola or the Blackcomb Gondola up first, transfer at the top, cross to the other mountain, and come down on the other side. Allow at least half a day for the full outing — uploads, queues, the crossing itself, lunch at a mountaintop lodge, and the ride down. In winter, skiers cross free on a lift ticket; non-skiers buy a sightseeing ticket, and winter sightseeing access, hours and prices are different from the summer sightseeing pass, so check the current winter details on the official site before you go. I double-checked the 2026–27 dates on the resort’s official hours page before writing this: the Peak 2 Peak Gondola runs November 25, 2026 to April 18, 2027, with winter sightseeing hours of 10:00 AM to 3:30 PM from November 20 to January 15. Wind can pause the lift (it hangs very high, remember), so a clear, calm morning is worth waiting a day for. → Whistler Blackcomb — official site
Pro tip: A couple of the Peak 2 Peak cabins have glass floors. You may wait longer for one, and honestly the regular cabins already have wraparound glass — I rode a regular cabin and missed nothing. If heights bother you, stand in the middle of the cabin, not by the glass, and look across the valley instead of straight down. It works.
My own Peak 2 Peak morning went like this: up the Whistler Village Gondola at opening, coffee at the Roundhouse Lodge while the cloud burned off, then the crossing with a whole cabin to myself because everyone else was already on the slopes. On the Blackcomb side I watched skiers drop into a bowl I would never, ever attempt, and felt zero envy — I had the view and a warm lodge, and they had cold chairlifts. Do not skip the mountaintop lunch. Eating at 1,850 metres while everyone around you is in ski boots is one of the great non-skier pleasures of Whistler.

Tube Park and the mountain base, without skis
The Blackcomb Tube Park is the single best answer to “but what do I actually DO up there?” You sit in a big inflatable tube, someone gives you a push, and gravity does the rest — no balance, no lessons, no falling over. Lanes are groomed, speeds are gentle by design, and a lift carries your tube back up so the only effort is laughing. It’s in the Blackcomb base area, it runs on its own ticket (separate from lift tickets), and it’s the rare mountain activity where kids, grandparents and nervous adults are all equally good at it on the first try.
I’ll be honest: I went to the Tube Park expecting a kids’ attraction and stayed for over an hour. There is something deeply satisfying about an activity with no learning curve whatsoever after a morning spent watching skiers clip in and out of complicated bindings. Go in the late morning, when the lanes are freshly groomed and the light is good, and wear waterproof pants — you will sit in snow, repeatedly, on purpose. Check current Tube Park hours and ticket details on the Whistler Blackcomb site, since the park’s operating days shift with the season. → Whistler Blackcomb — official site
Heads up: Tube Park tickets and gondola sightseeing tickets are separate purchases, and neither is included with the other. Budget for both if you want both — the calculator below keeps them as separate line items for exactly this reason.
While you’re at the base, do the other non-skier base activity nobody talks about: watching. The base areas are built for spectators — patios, fire pits, big windows, and a constant parade of skiers coming down. I spent a happy hour at a Blackcomb base patio with hot chocolate, watching the same run produce triumph, comedy and one very graceful face-plant. It’s free, it’s warm, and it counts as mountain time.

Snowshoeing at Lost Lake and the Valley Trail

Snowshoeing is the non-skier’s backcountry — well, the gentle, signed, ten-minutes-from-the-village version of it. Lost Lake Park has groomed snowshoe trails through quiet forest to a frozen lake, and the Valley Trail links the village to the lake on a flat, easy path. Rentals are available in the village (book the morning of, or the day before on a busy weekend), and if you can walk, you can snowshoe: the shoes strap over your winter boots and the technique is, genuinely, just walking with slightly wider feet.
I did Lost Lake on my second morning, after the gondola day, and it was the quietest hour of my trip. No lift music, no crowds, just snow-loaded trees and the squeak of snowshoes on a groomed trail. Pro tip: go early, before the trails get churned up, and take the lakeside loop rather than the shortest out-and-back — the lake view is the payoff, and it’s flat the whole way. Fair warning: the trail signs assume you know the difference between the cross-country ski tracks and the snowshoe path. Stay off the groomed ski tracks (skiers are fast and silent), and keep to the packed snowshoe side.
If you want a longer day out, Whistler Olympic Park in the Callaghan Valley — about 20 minutes south of the village — runs cross-country skiing, snowshoeing, tobogganing and even a biathlon try-it session on the 2010 Olympic Nordic site. It’s a separate excursion and worth it if you have a third day, especially for the ski-jump viewing area, where the size of the jumps makes you quietly grateful you chose snowshoes. → Whistler Olympic Park — official site
Ice skating at Whistler Olympic Plaza

Whistler Olympic Plaza — the square built for the 2010 Winter Games, right in the village — turns into an outdoor rink in winter, and it is the best free evening in town. Skating on the outdoor rink is free; skate rentals at the plaza are a few dollars. I skated here on my last night, wobbling around the rink while the village lights came on, and it was the most postcard-perfect hour of the trip. The rings sculpture beside the rink is the photo everyone takes, and yes, I took it too.
The plaza also hosts village events through the winter — markets, celebrations, outdoor shows — so check what’s on during your dates. Even with nothing scheduled, it’s the natural meeting point: central, free, and right beside the village stroll. If you don’t skate, the benches around the rink are prime people-watching, and the hot chocolate stand does steady business for a reason.
Local secret: Skate in the early evening, just as the lights come on but before the dinner crowd arrives. The rink is quietest then, the village looks its best, and you can walk straight from the ice to a restaurant without changing out of anything except your skates.
The Olympic side: Whistler Olympic Park and the Sliding Centre
Whistler hosted the 2010 Winter Games, and the Olympic venues are still working places you can visit as a non-skier — not museums, but actual tracks and jumps with public programs. Two are worth your time.
Whistler Olympic Park in the Callaghan Valley is the Nordic site: cross-country trails, snowshoe routes, a toboggan hill, and the ski jumps, which are genuinely startling in person. You can watch jumpers train on some days, and the viewing area gives you the full sense of scale — those jumps are far bigger than they look on television. Check the park’s site for current day tickets and which activities are running on your dates. → Whistler Olympic Park — official site

Whistler Sliding Centre is the one I’d book first if you like a thrill. It’s the only refrigerated sliding track in Canada, and the public passenger bobsleigh program puts you in a real four-person bobsled with a trained pilot, down a 1,450-metre track at 125+ km/h with up to 4 g-forces in the corners. No experience needed — that’s the point — but there are age, height and weight limits (over 14, and within the size range the centre publishes), and you should check the health notes on the official site before booking, because 4 g is not a gentle ride. The whole experience runs about 90 minutes including orientation and helmet fitting. It runs rain, snow or shine, which makes it the perfect bad-weather backup plan. → Whistler Sliding Centre — official site

Heads up: The Sliding Centre is also a working training centre, so public sessions run on set days and sell out on weekends. Book ahead, and don’t plan it for your departure day — if a training session or weather shifts the schedule, you want a spare day to move it to.
Dog sledding is the other Callaghan Valley classic. Blackcomb Snowmobile runs a guided Mountain Mushing tour in the Callaghan Valley: a 2.5-hour round trip, departing at 9:00 AM, 10:30 AM or 1:30 PM, where you help harness the team and then ride under blankets through the snow-covered valley. The operator lists it at C$799 per sled for one or two people (C$899 for two adults and one child), so it is a splurge — and, fair warning, weekends go early, so book ahead and confirm the price for your dates on the operator’s own page. I didn’t ride on my trip (booked out on my dates), but it’s the one activity every local I asked named first for non-skiers with a third day. → Blackcomb Snowmobile — Mountain Mushing dogsled tour
Ziplining over the winter forest
Yes, you can zipline in Whistler in winter — and honestly, flying over snow-dusted forest is the version I’d pick over the summer one. Two operators run winter tours from the Cougar Mountain area, about 10 minutes from the village. Superfly Ziplines runs year-round, with a winter season from mid-December to mid-April: four tandem lines between Cougar and Rainbow mountains, a 2–3 hour tour, with lines over a kilometre long and speeds up to around 100 km/h, listed from $180 per person on Tourism Whistler’s zipline page. Ziptrek’s winter-only Apres Tour is the evening alternative — zip through the old-growth forest as the alpenglow fades, listed from $170 per person. Both run rain, snow or shine, so dress in full winter gear (layers, gloves, warm boots) and expect the wind chill at height to be much colder than the village. I double-checked the winter seasons and from-prices on Tourism Whistler’s zipline listing before writing this, and both can change by season, so confirm for your dates. → Tourism Whistler — zipline tours
Pro tip: If heights make you nervous, pick Superfly’s tandem lines over a solo-line tour — riding side by side with someone you know makes the first drop much easier, and the guides are used to nervous first-timers. Trust me on this one: the fear lasts about ten seconds, the view lasts the whole line.
The warm-water reset: Scandinave Spa and hotel pools

After a day outside, Whistler’s warm-water ritual is the reward — and for non-skiers it’s arguably the main event. Scandinave Spa, a short walk from the village in the forest, is an outdoor bath circuit: hot pools, a eucalyptus steam room, saunas, and cold plunges, all outside among the trees. The rule that defines it is silence: no talking in the baths. I was skeptical about this — I like talking — and then I spent two hours not talking and felt better than I had in months. It’s adults-only, so check the age rule on the official site before bringing teenagers, and bring a swimsuit, sandals and a water bottle (you’ll drink more than you expect). → Scandinave Spa Whistler — official site
If Scandinave is booked out (it happens on Saturdays), the backup plan is your own hotel: many Whistler hotels have outdoor heated pools and hot tubs that steam gloriously in cold air, and a pool afternoon costs nothing extra if you’re already staying there. When I priced my trip, the hotels with the best pool setups were worth a small premium over the cheapest room — in January, the pool is not an amenity, it’s the evening plan. Game-changer for the budget: one spa visit plus hotel-pool evenings beats a spa visit every day.
Pro tip: Book Scandinave for late afternoon, so you finish as the light goes and walk back to the village for dinner. The forest path back in the blue hour, hair still damp, is half the experience — and you’ll be warm from the inside out.

Village strolls, food and the Audain Art Museum

Whistler Village itself is an attraction, and it’s entirely car-free — a network of stone walkways, squares and covered passages that you can wander for hours without a plan. I did exactly that on my arrival afternoon: no agenda, just the stroll, the shop windows, and the smell of waffles from somewhere I never found again. The village splits into two main areas, Whistler Village and the Upper Village (Blackcomb side), linked by a short walk — do both, because the Upper Village is quieter and has the better mountain views from its patios.
Food in the village runs the full range, and non-skiers have one advantage: you’re not starving at 4 pm like everyone coming off the slopes, so you can eat at normal hours and skip the worst queues. My pattern was a bakery breakfast, a casual lunch (the village has plenty of counter-service spots that won’t break the budget), and one proper dinner a day. The grocery store in the village is a genuine budget tool — breakfast supplies and sandwich fixings cut a surprising amount off a three-day food bill, and the calculator below assumes you mix one self-made meal a day into the budget and mid-range plans.
For a quiet indoor hour, the Audain Art Museum in the village is a proper museum, not a lobby gallery: a permanent collection of British Columbia art, including Indigenous works and Emily Carr paintings, in a beautiful timber building. It’s the ideal rainy-afternoon move, and it pairs well with the Squamish Lil’wat Cultural Centre in the Upper Village, which tells the story of the Squamish and Lil’wat Nations on whose shared territory Whistler sits. Do the cultural centre if you can — it changed how I saw the whole valley. → Audain Art Museum — official site
Local secret: The village’s best free entertainment is the afternoon “ski home” parade — skiers streaming down to the base as the lifts close, with the patios full and the buskers out. Grab a bench near the base, order something hot, and watch the mountain empty itself. No ticket required.
Vallea Lumina — the evening light walk
Vallea Lumina is the one activity in this guide that sounds strange on paper and works beautifully in person: an evening multimedia walk through the old-growth forest on Cougar Mountain, about 15 minutes from the village, where lights, projections and sound turn a forest trail into a story you walk through. It runs year-round and starts after sunset; in winter the first entries can start as early as around 5 pm, according to the official site, which means you can do it before dinner rather than after.
The winter trail is about a kilometre, groomed and gentler than the summer route, and it takes most people 30–40 minutes at a wandering pace. Book a shuttle-inclusive ticket if you’re staying in the village: the official site lists the round-trip shuttle from the Gateway Loop at $10 per person, and the shuttles are small (about two dozen seats), so they sell out on busy nights. Dress warmly and wear boots with grip — you’re walking a forest trail in winter, not a city path — and go after a snowfall if you can, when the lights land on fresh snow. I checked the official site for the shuttle price and start-time pattern before writing this, and both can change by season, so confirm for your dates. → Vallea Lumina — official site
One honest note: no photo in this article shows Vallea Lumina itself. I couldn’t find a freely licensed photo of the walk on Wikimedia Commons, and I’d rather leave the section imageless than illustrate a light show with a generic forest photo and pretend otherwise. The walk is best experienced without knowing exactly what it looks like anyway — trust me on this one.
What non-skiers can’t do (and the weather truth)

Let’s be plain about the limits, because a good guide says what’s off the table. Without skis or a board, you cannot use the ski runs, the terrain parks, or the backcountry gates — and you shouldn’t try to talk your way onto them. You can’t ski down from the Peak 2 Peak terminals, so the gondola trip is an up-and-back outing, not a one-way ride. The Cloudraker Skybridge and the summer-only mountaintop trails are not winter non-skier activities either; winter mountaintop walking is limited to the lodge areas and viewpoints, not hiking trails buried under metres of snow.
The weather truth: Whistler village gets rain. Not every day, not every trip, but mild Pacific storms can bring rain at village level while the alpine gets snow, and a trip that coincides with one can feel grey at the bottom even when the top is glorious. My advice, learned the soggy way: keep the gondola and the Sliding Centre for your best-weather day, keep Vallea Lumina and the spa for the grey ones (both are better in gloom, honestly), and never judge the mountain by the village sky. Check the mountain webcams, not just the village forecast, before deciding a day is ruined.
What about the cold? Village winter days usually sit around freezing, and the mountaintop is colder and windier. The clothing rule that worked for me: waterproof outer layer, warm mid-layer, proper winter boots with grip (not fashion boots — the village walkways ice up), gloves you can actually use your phone with, and a hat. Renting snowshoes is easy; buying a whole winter wardrobe in the village is expensive, so bring what you have.
What does a non-skier weekend cost?
Prices below are planning ranges for a non-skier trip — what I budgeted across my visits, per person per day, in Canadian dollars. Pick your travel style, tell the calculator how many days you’re staying, and it does the rest. (Accommodation not included — see the table below for that.) The big-ticket items for non-skiers are the gondola sightseeing ticket, the Tube Park, the spa, and Vallea Lumina; spread across three days, they average out to the “sights” line below.
Budget calculator
Per person, in Canadian dollars. Excludes accommodation.
Budget ≈ $100/day · Mid-range ≈ $170/day · Luxury ≈ $300/day. All figures are approximate planning ranges for 2026–27, not quoted rates.
| Expense (per person / day) | Budget | Mid-range | Luxury |
|---|---|---|---|
| Accommodation | $60 (hostel dorm / shared) | $200 (village hotel) | $450+ (slopeside suite) |
| Food & drink | $45 | $75 | $140 |
| Sights (gondola, tube, spa, Vallea Lumina, averaged) | $30 | $55 | $90 |
| Getting around (bus share + village) | $10 | $15 | $30 |
| Coffee, treats & souvenirs | $15 | $25 | $40 |
| Daily total | ~$160 | ~$370 | ~$750 |
Wondering how the wider trip budget compares? My Canada trip cost guide breaks down national averages, and the Canada ski trip cost guide shows what the same weekend costs if your friends do ski — spoiler: the non-skier version is noticeably cheaper, mostly because you skip the lift ticket and rentals entirely.
Suggested 3-day plan, no skis required
| Time | Day 1 — up the mountain | Day 2 — snow & ice | Day 3 — slow & warm |
|---|---|---|---|
| Morning | Peak 2 Peak Gondola at opening, mountaintop coffee | Snowshoeing at Lost Lake, early start | Audain Art Museum + Squamish Lil’wat Cultural Centre |
| Midday | Mountaintop lunch, then Tube Park at Blackcomb base | Whistler Olympic Park or Sliding Centre bobsleigh | Village stroll, Upper Village patios, market browsing |
| Afternoon | Base-area patio watching + village stroll | Ice skating at Whistler Olympic Plaza | Scandinave Spa, late-afternoon session |
| Evening | Vallea Lumina light walk (book shuttle ahead) | Village dinner + rink-side hot chocolate | Farewell dinner in the village, early night before the bus |
FAQs about Whistler in winter for non-skiers
Is Whistler worth visiting if you don’t ski?
Yes — honestly, yes, and I say that as someone who doesn’t ski at all. Two to three days fill easily with the Peak 2 Peak Gondola, the Tube Park, snowshoeing, skating, the Sliding Centre, the spa, Vallea Lumina and the village itself. What you miss is the ski runs; what you keep is the mountain, the village, and the food. If you only have one day, do the gondola and the village — that’s the essential Whistler.
Can non-skiers ride the Peak 2 Peak Gondola in winter?
Yes, with a sightseeing ticket bought from Whistler Blackcomb — skiers cross free on a lift ticket, but non-skiers need the sightseeing option, and winter sightseeing access, hours and prices differ from the summer pass. Check the current winter details on the official site before you go, and pick a clear, calm morning: wind can pause the lift, and the whole point of the ride is the view.
What is Vallea Lumina, and is it worth it?
Vallea Lumina is an evening multimedia walk through the forest on Cougar Mountain, about 15 minutes from Whistler Village: lights, projections and sound along a roughly 1 km winter trail, starting after sunset (winter entries can begin as early as around 5 pm). Book a shuttle-inclusive ticket — the official site lists the round-trip shuttle from the Gateway Loop at $10 per person, and seats are limited. It’s gentle, it’s outdoors, and after a snowfall it’s genuinely lovely. Dress warmly and wear boots with grip.
Do I need a car in Whistler?
No — and you’ll be happier without one. Coaches run from Vancouver to the village in about two hours, the village itself is car-free and walkable, and every stop in this guide is reachable on foot or by local bus, except the Callaghan Valley venues (Olympic Park and dog sledding), which need a shuttle, taxi or tour pickup. The one exception to the no-car rule: if you’re adding a Sea to Sky road trip, rent for that day only. See my day trips from Vancouver without a car guide for the car-free playbook.
What is the weather really like in Whistler in winter?
Expect a mix: cold, snowy days up the mountain and milder, sometimes rainy spells in the village, which sits much lower. January days in the village usually hover around freezing, and the mountaintop is colder and windier. Pack a waterproof jacket regardless of the forecast, check the mountain webcams (not just the village forecast) before judging a day, and keep the gondola for your clearest morning. Rain in the village does not mean a ruined trip — the spa and Vallea Lumina are both better in gloom.
How many days do you need in Whistler as a non-skier?
Two full days cover the essentials: day one for the gondola and Tube Park, day two for snowshoeing, skating and the village, with Vallea Lumina on either evening. Three days is the sweet spot — it adds the Sliding Centre or Olympic Park, the spa, and a slow village morning without rushing. With one day only, do the gondola in the morning and the village in the afternoon, and save the rest for next time. For the wider region, my weekend getaways from Vancouver guide puts Whistler in context, and things to do in Vancouver covers the city end of the trip.
Keep exploring
Whistler is just the start — here’s where I’d go next:
- Sea to Sky highway stops — the drive up, done properly, with Squamish and Shannon Falls
- Things to do in Squamish — the town halfway up, worth a stop in its own right
- Day trips from Vancouver without a car — the car-free playbook this trip follows
- Things to do in Vancouver — the city end of the Sea to Sky trip
- Vancouver in winter — what the coast looks like in the cold months
- Winter driving in Canada for tourists — if you do rent a car for the Sea to Sky road
You’ve got this. Whistler rewards the planner — and the non-skier who plans gets the mountain without the bruises.